January 29, 2011
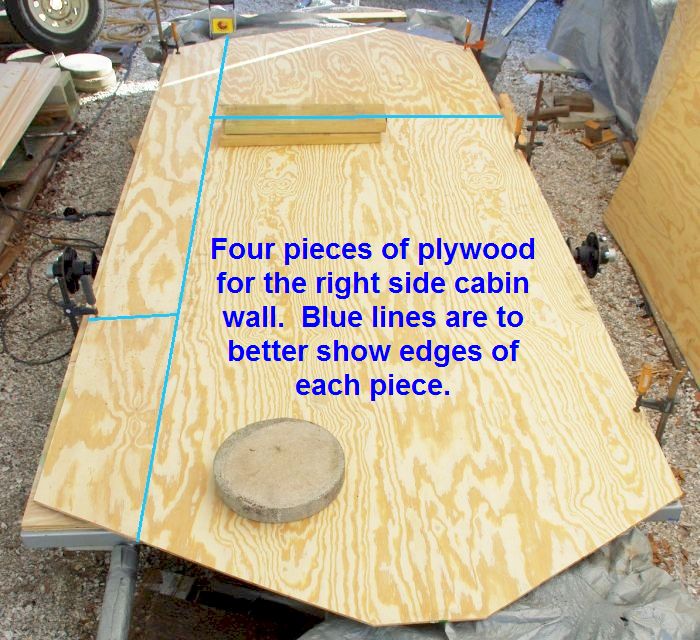
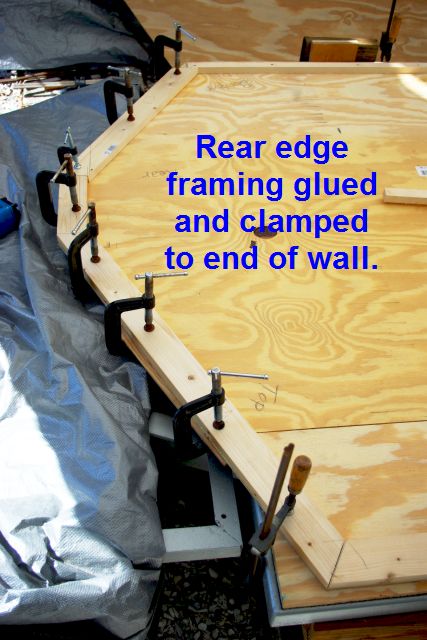
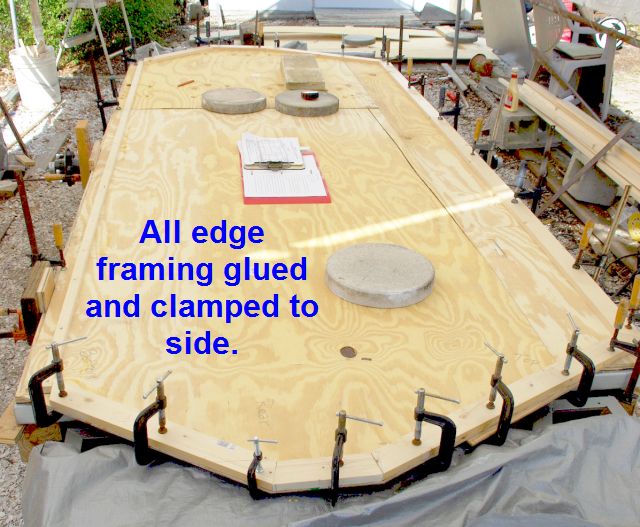
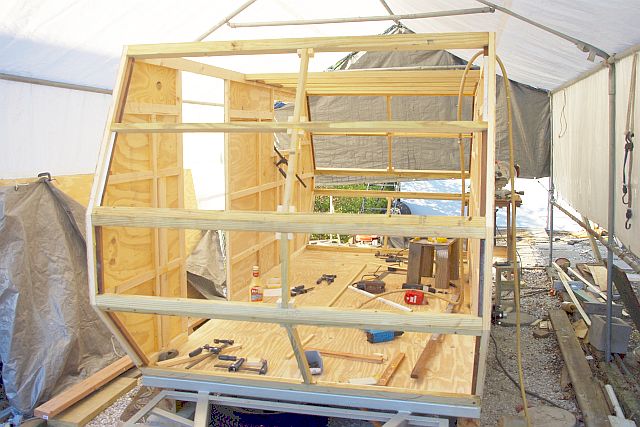
Today I made good progress on the right side. The wall to floor connector strip and edge framing was cut and glued and clamped in place, fixed with 7/8” brads. After the photos below were shot, I started on the inside framing. When that’s finished tomorrow, I’ll add another photo of the nearly completed right side.
January 30, 2011
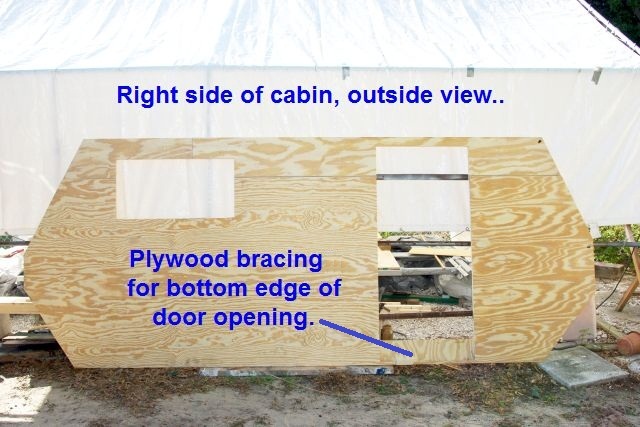
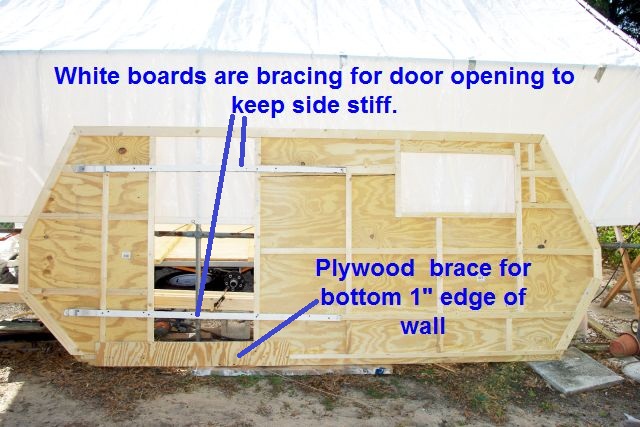
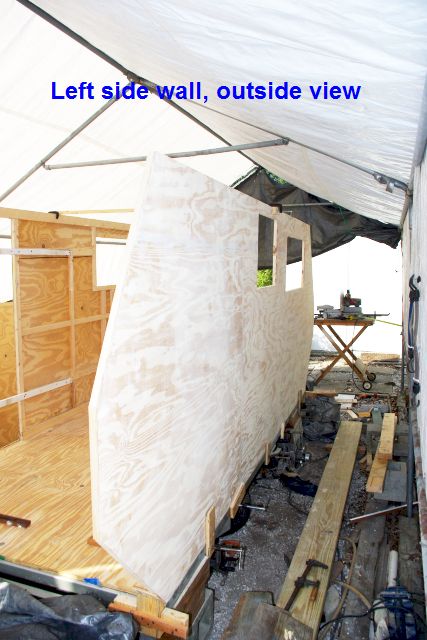
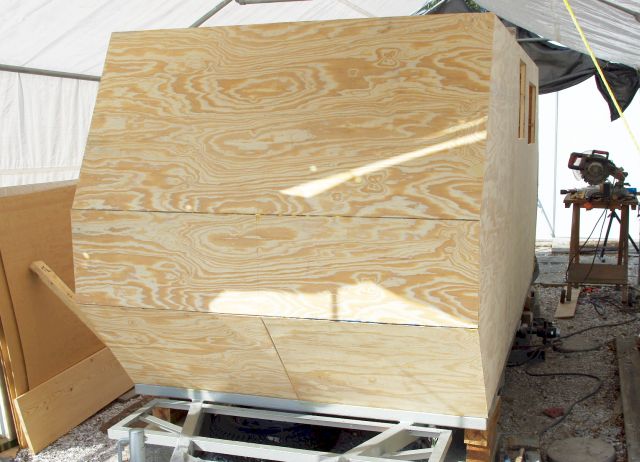
Today I completed construction of the right side wall. I have yet to do filling of the gooves created by the connecting bevelled edges of the wall pieces, screw holes, etc. I put two pieces of 1x2 across the door opening, screwed to framing to keep the wall stiff, and a piece of plywood at the bottom of the door as two 1"strips of wall meet there and need to be secured until the wall is put in place. Once the wall is connected to the floor, the bracing will be removed. The two photos below show the inside and outside of the wall. With my Gorilla Gripper, I can lift and carry the wall without too much strain.
February 3, 2011
Today was all labor intensive, filling and sanding with water putty and making guides to help position the walls on the floor.
February 4, 2011
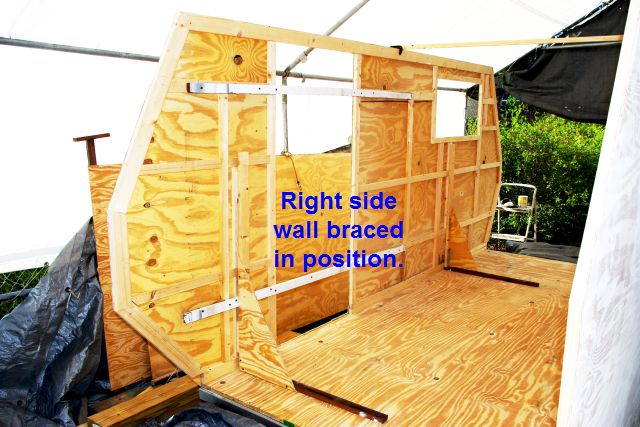
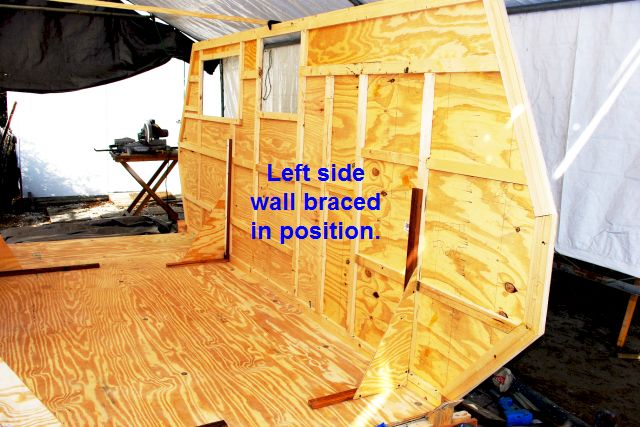
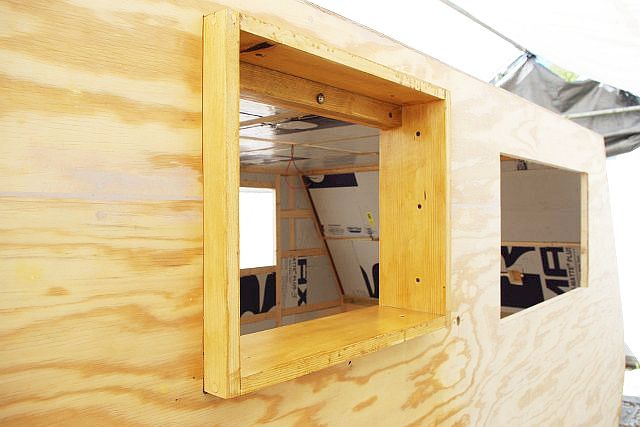
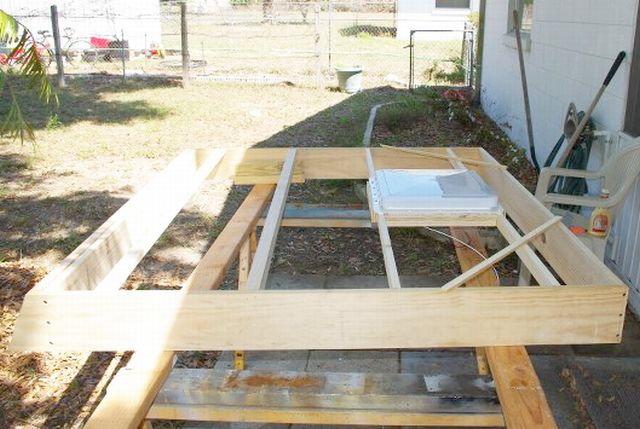
I finished the filling and sanding today then attached the floor connector strips to the floor edges with glue and screws. I made my wall braces from cut off corners of the plywood and pieces of 1x2. One side at a time, I attached my wall positioning guides to the side and end rails, applied glue to the floor connector strips and set the walls in place. Once I had the walls positioned, I put screws through the wall connector strips into the floor connector strips. Tomorrow, I’ll put screws through the lower edges of the walls into the floor connector strips. That cabin isn’t going to blow off this chassis.
The photos below show the walls in place with floor bracing and a cross brace at the top of the walls. You’ll see two holes in the left wall. The forward hole is for the AC mount. I also picked up my door that had to be remade and it looks good.
February 8, 2011
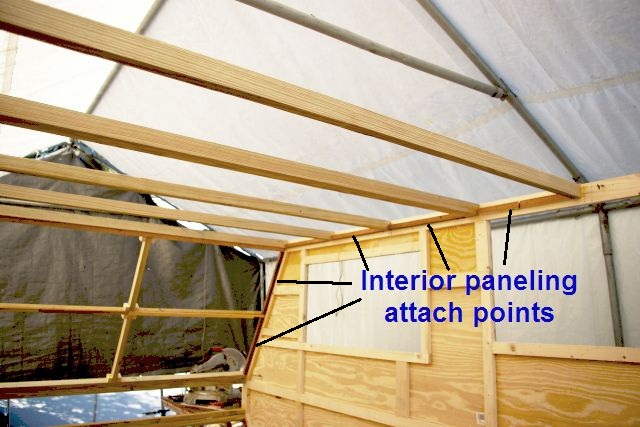
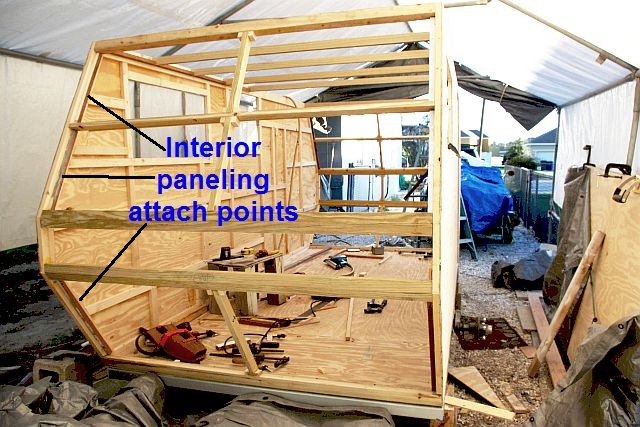
For the past four days I’ve worked from 4 to 6 hours each say ripping, cutting and fitting the spars. It reqauires eight pairs of spars for the ends. That’s four pair of spars in front and four pair in back, each pair ripped at the same precise angles so that each pair can be joined to form one angled spar. Once the spars were installed, I installed vertical spar connectors in the center of each end. I have yet to install the same pieces in the roof spars. The last thing I did today, so the outside edges of the interior paneling for the ceiling and front and rear walls has a point for brads to attach to, I installed 3/4” x 3/4” strips of scrap wood to the outside framing pieces, flush with the inside face of the spars.
February 17, 2011
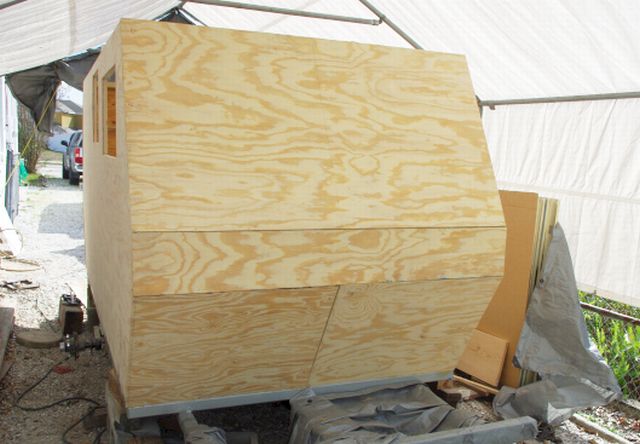
It's week--no, more like 9 days since an update. We'd had a couple of cold days that I didn't get much work done, then lately, I was not feeling well for a day or two. What work I did get done was slow tedious stuff, running wiring, fabricating couduit from smurf tube and PVC parts. I did some rechecking of cabinetry attach points and added some more framing. I made my AC wall mount and am working on my TV mount in my spare time. My biggest progress was to get the end skins on today so that it now actually looks like a trailer coming together. Photos below show the skins on. The AC mount won't get a photo until it's in the wall, ant that's weeks away...maybe a month or two. In the end wall photos, you'll notice that the lower panel in both front and back are two pieces made from scrap of the two sheets of plywood so I didn't have to buy a third sheet. All filling and sanding has yet to be done and will take a couple or three days to complete.
Rear Wall
Front Wall
February 19, 2011
No photos today. I did a lot of filling and sanding on the end walls and screw holes I put in the side walls for the floor connection on the bottom and spars on the ends and top. I also cut and fitted the two rearmost paneling sheets to mark and cut out the window, door and AC mount openings. Once the cutting was finished, they went in the shed until I need them to finish the interior later on. I’m planning on a day off to go fishing tomorrow and need to pick up a few more cartridges of Liquid Nails, brads for my nailer, and sanding disks. Then, it’s back to work on the outside walls, add framing to support my DVD shelf, and to start sticking foam insulation in the side walls. I ordered my fenders today so I can put the support framing in the side walls before I do the paneling. Maybe I’ll start roofing it by next weekend…we’ll see how it goes.
March 5, 2011
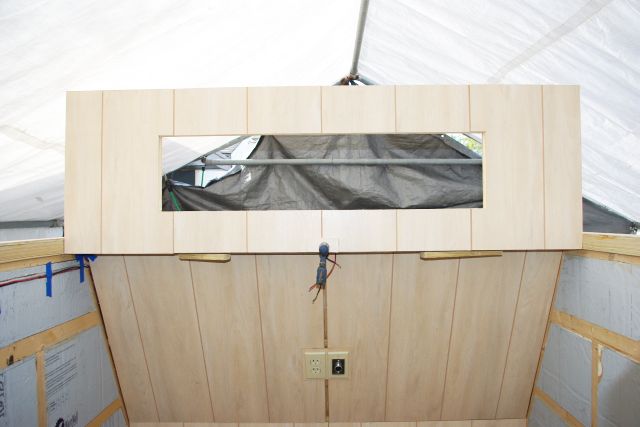
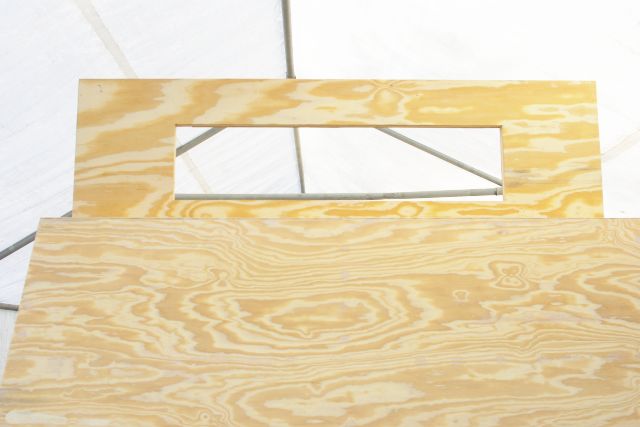
It's been a while since I had any photos worth posting. I've been doing a lot of detail work inside (wiring, insulation, some paneling, outlets, etc.) and more filling and sanding outside. Yesterday, I started on my raised panels to support the pop top. I've constructed the two end panels, but haven't yet put in the glass windows or cut off the raised edge where they will hinge up and down. I clamped one in place for these photos.
Front Wall
March 13, 2011
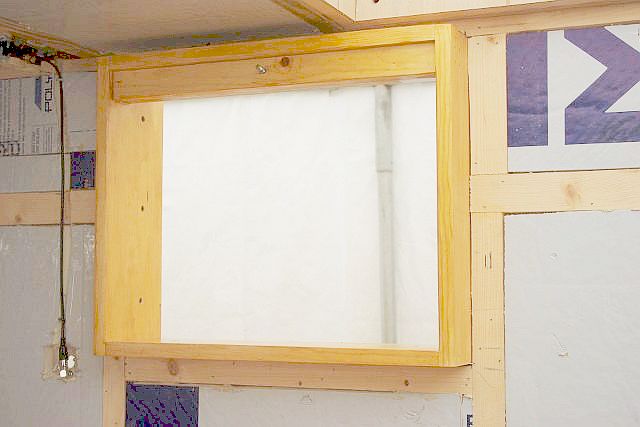
II've been working on the raised panels that support the pop top and applying epoxy resin to the skins and sanding it lightly. The ends and top will get two coats of resin. I haven't decided yet if I want to put two coats on the side walls. Before coating the sides, I put in my AC mounting box.
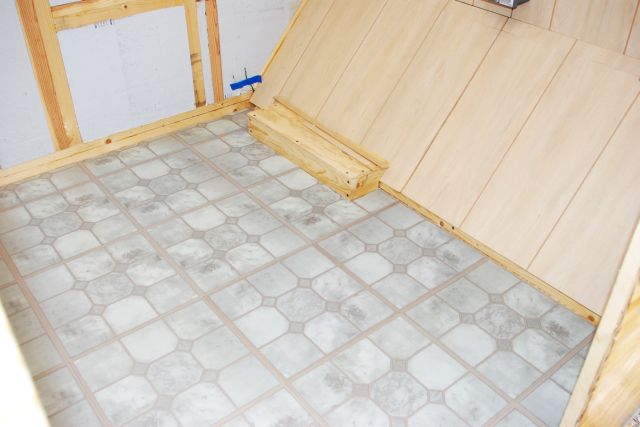
After doing some resin coating today, I decided to put down my vinyl stick-on floor tiles. I opted for whatever Home Depot had in stock. I would have prefered less patern, but they are a soft gray and go well with the paneling.
April 5, 2011
I've kept busy working on the trailer and putting off updating the WEB site.
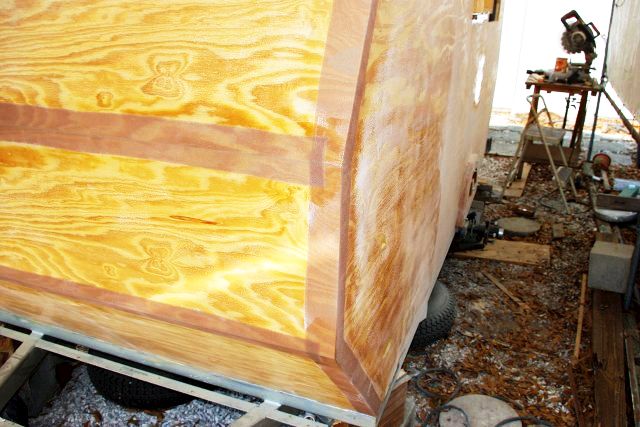
I covered the exterior joints where sides join the top and front pieces with epoxy resin and cloth. Rather than use fiberglass cloth, which was all too heavy for my taste, I used cotton/polyester bed sheet material and it worked out perfectly. I had to be careful not to sand through it.
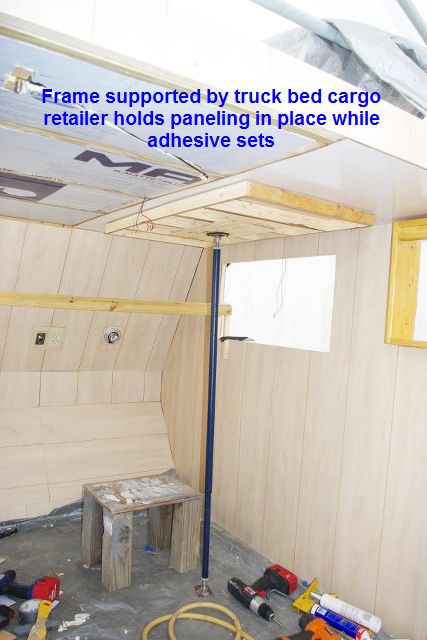
I completed my interior paneling installation. To make sure the paneling stayed flat while the adhesive set, I used my adjustable cargo retainer from my truck as in the photo below.
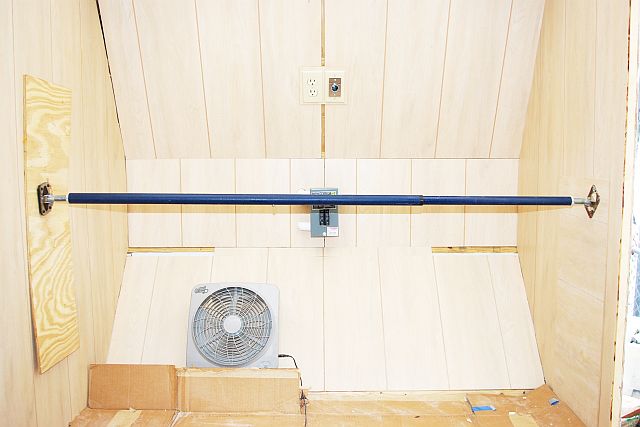
I also used it to hole the ceiling paneling in place, with a frame I made to support a large area of the paneling piece. All paneling is flat with no warping or bowing out in places.
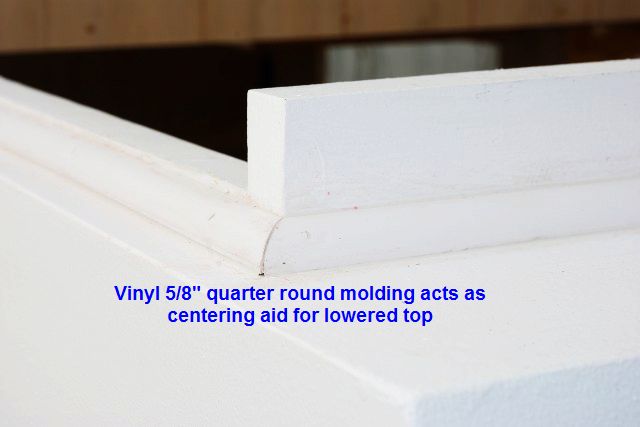
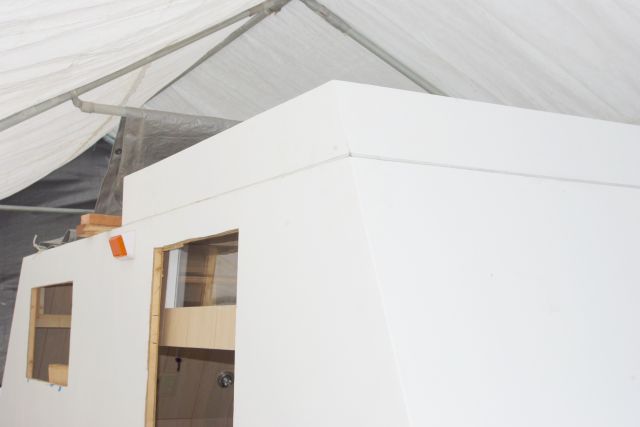
To make sure the top is centered around the raised edges of the roof opening, I installed pieces of 5/8" vinyl quarter round molding. If it works like I planned, the bottom edges of the top should slide down the molding and be within 1/8" of centered all around the opening.
It will be several days before I'm ready to post more photos. I am currently getting the top, tongue boxes and AC box cover painted for in stallation. I'm also preparing to install the fenders and to cut and fit the molding around the frame and lower 1" of the sides. I am also working on a cabin-wide "box" to hold an auto type AM/FM/CD/MP3 receiver and four speakers. Look for more photos by the end of the week.
April 19, 2011
Sorry it’s been too long since I updated the build site. I got a lot done since the last update, but the top had to be removed after I got it up on the roof as I made an error on clearances when I put the wood seal strips in the upper corners. I had to take it down, remove the seal strips and cut them down in height. The top is back on the roof waiting for me to finish the aluminum seal pieces on the end panels. This is the top in the lowered position.
this is the top while under construction, framing in the Fantastic fan.
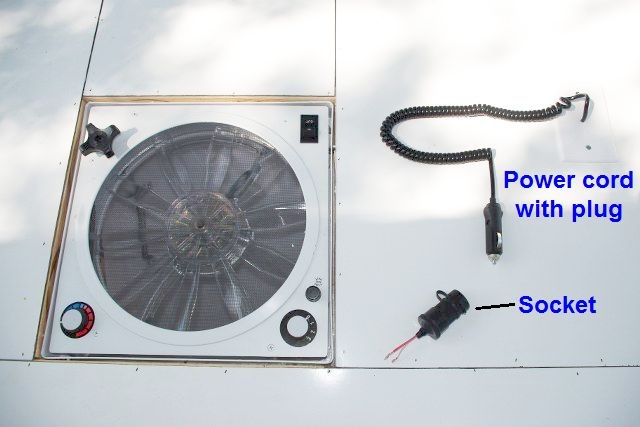
After completing the top, I used a blank outlet cover with a hold drilled in it for the wire from a 12VDC plug to run through to connect to the fan and light. The socket laying there will be connected to wiring out of the left side wall to provide power to the top via the plug.
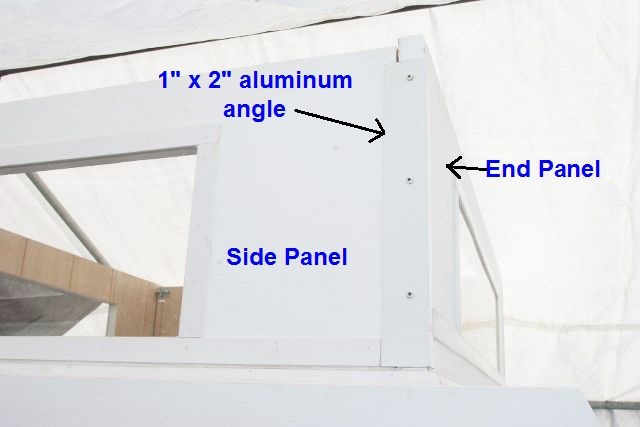
This is a shot of the panels raised with the aluminum angle panel weather seal pieces in place that I removed before I knew the full problem with the clearances in the top. I have to replace them now.
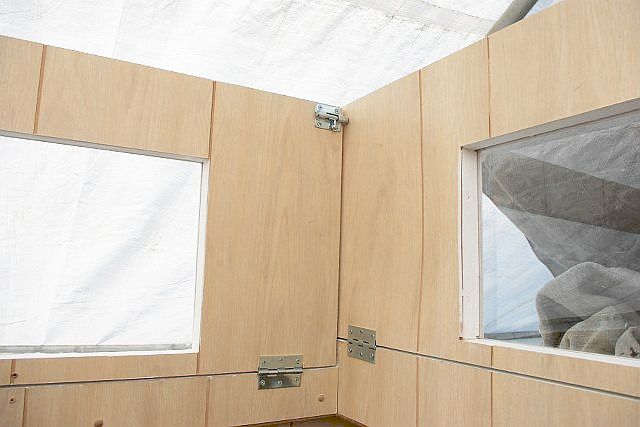
These next two photos show how small barrel bolts lock the panels together and also keep the lowered side panels flat beneath the end panels and top when stored or traveling.

These two photos show the couch/bed frames mocked up on temporary supports to check the fit. I had to angle trim the back frame to move the extended bed back a half inch to make the fit between the rear wall and the side cabinet to be built on the left wall next to the AC box. My completed stereo cabinet is partially seen above the couch frame. Sorry about the poor perspective of the photo. That sometimes happens with wide angle shots. Trust me, everything is straight, not at some weird angles.
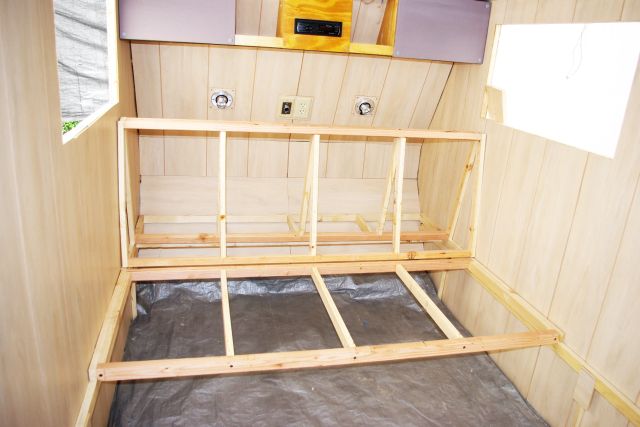
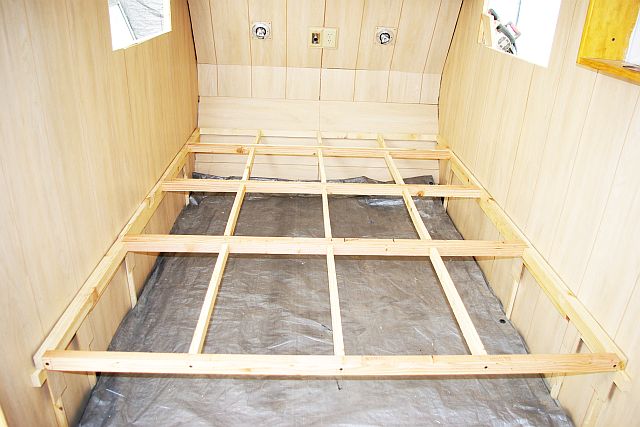
I'll show the couch/bed setup again after covering the frames and finishing the support cabinetry.
April 20, 2011
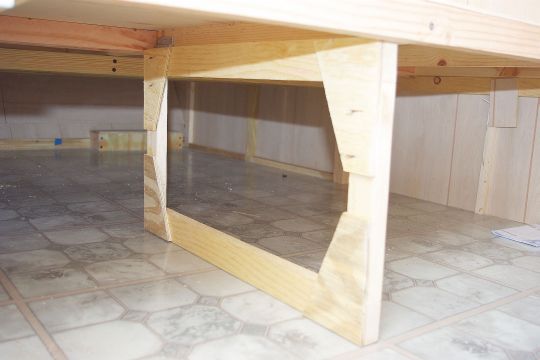
I’ve nearly finished the cabinetry for the couch support platform. All that is needed to complete it is a facing frame to support the doors. The facing frame and doors will be stained and varnished using Minwax Polyshades, a stain and varnish in one can.
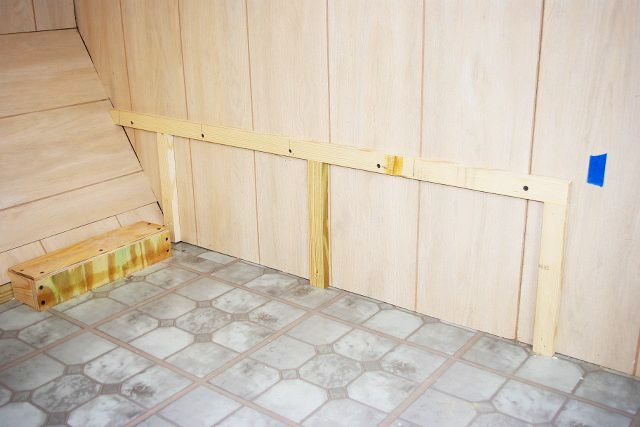
First, two side frame pieces are constructed and attached to framing placed inside the walls for that purpose.
Then, the cross members are added with pocket hole screws and an extra vertical support piece is added to each side of the front, under the ends of the front cross member for added strength.
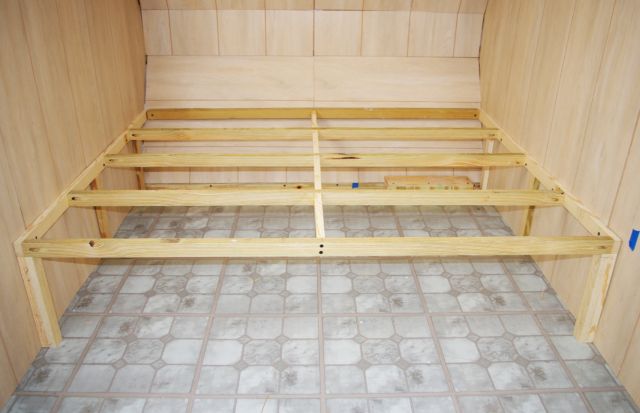
This platform won’t be covered with plywood as it won’t be seen. Leaving it open allows the user to fold the couch/bed panels back to get to the area from above if necessary. Next step: Construct, varnish and Install the facing frame and install the hinges to connect the four panels for the couch frame/bed platform.
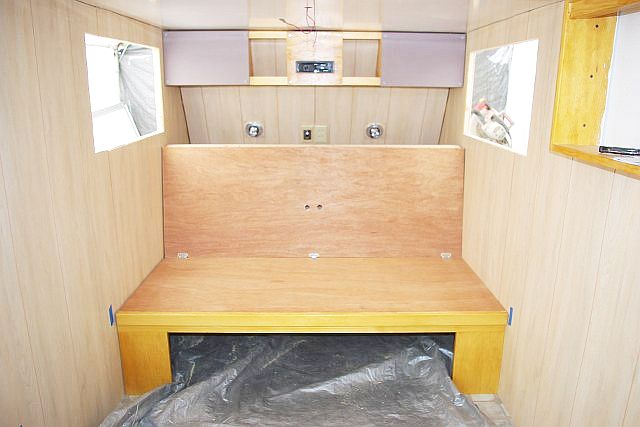
This photo shows the completed couch/bed platform sections in what I call “couch mode”.
Although I made the bed platforms very sturdy, I still added some insurance, a fold-down support under the end platform section.
May 1, 2011
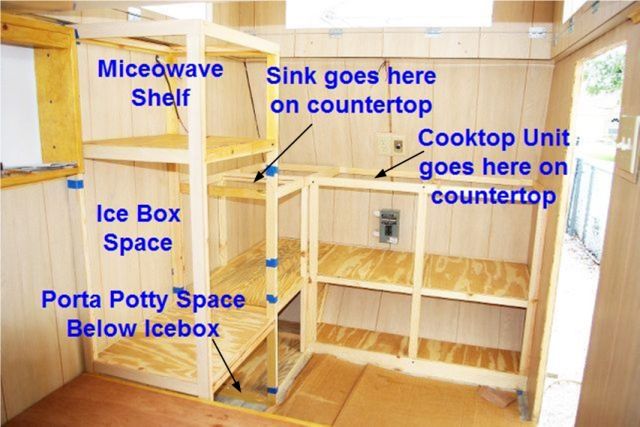
Since the last page update, I’ve been working on the galley cabinets. I’ve finished the face framing (clear pine, stained and varnished with Minwax Polyshades Honey Pine, topped with an extra coat of clear satin poly varnish), but it’s not installed in the photo below. This photo shows the completed basic framing with the shelving in place. You can see the end of the bed platform as it extends right up to the tall cabinet on the left wall. The tall cabinet will house my microwave in the top, the icebox in the center, and the porta potty at the bottom with a door on that section. The side cabinet will have a sink next to the tall cabinet, then the 2-burner cooktop unit just around the corner, and some countertop work space to the right.
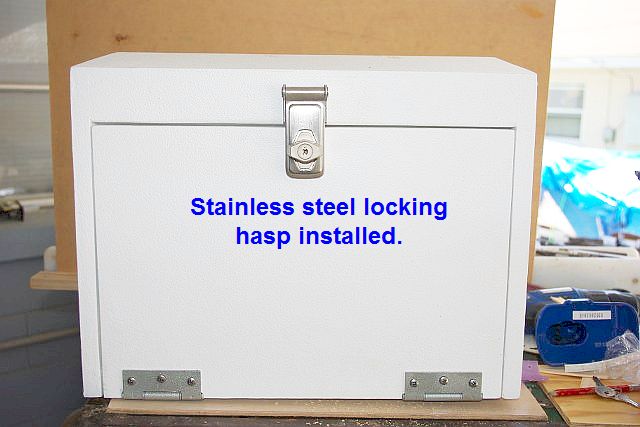
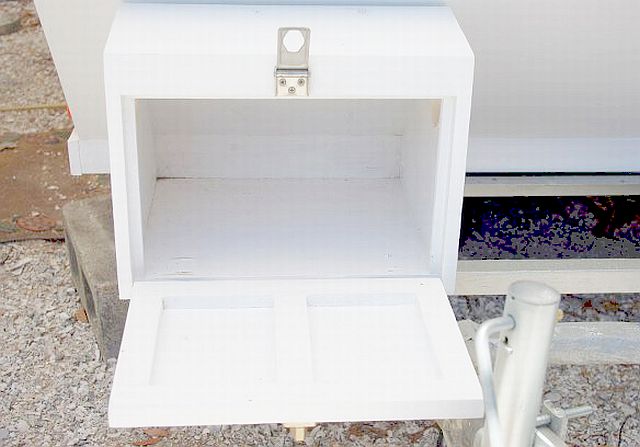
Finally, today, I put the hinges and locking hasps on the two tongue boxes. Here’s the battery box.

PT Build Home Page
Parts and Equipment
Chassis Construction
Floor Construction
Electrical
-->