December 24
I used my wheelbarrow to haul my four trailer chassis rails, two tongue pieces and the bumper bar around to the carport.
December 28
I hauled some concrete blocks to the carport and set 6 blocks up on ends, two rows of three blocks, 5’ apart, then laid two 10’ 2x4s on top of each set of 3 blocks. This gives me about 19” working height for welding. Last time I had the pieces on the floor and it was hard to kneel and bend over to weld. This time, in a kneeling position, your back is straight when you weld.
It took me an hour or so to lay out the four pieces (sides and ends of the frame), and get them aligned perfectly. First, I found one end piece to be nearly a quarter inch longer than the other one, so I had to take it back and trim it off, then grind the edges again for the weld “Vs”. Finally, I had it same width and length at each end and put corner magnets in place to keep it from moving. Then, I clamped down one side and did the diagonal measurements to square it up. I had to move one side back and forth a couple of times to get the diagonal measurements the same. Once they were, I clamped down the entire frame to the 2x4s and blocks to keep it from moving until it’s tack welded. Once the frame and cross members are tack welded so it can’t shift, I’ll take out the 2x4s.

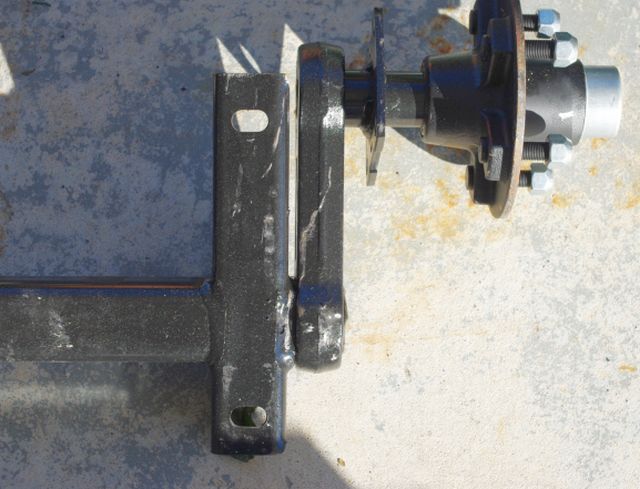
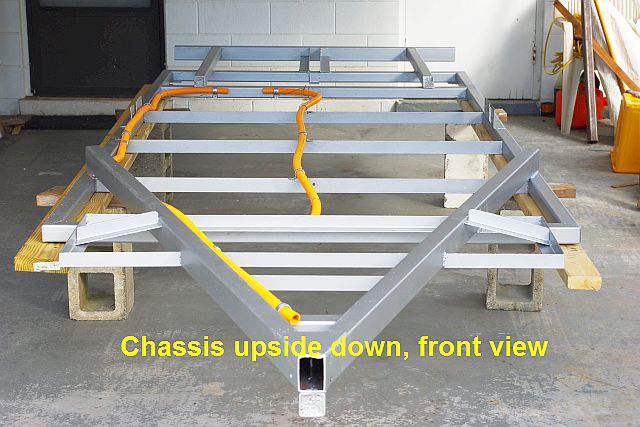
I found that the swing-arms on my torsion axle are very close to the frame rail, abut 1/4”-3/8” clearance, and I wanted to put some molding on the frame over the lower edges of the wall plywood. I’ll have to rip it pretty thin to fit. My frame ended up 59 3/4”, not 60” wide, so that gives me a 1/8” additional clearance for the swing-arms on each side. That’s not much, but every little bit helps. The mounting brackets you see in the photo below are exactly 60” right side outside edge to left side outside edge. You can see how narrow the clearance is for the swing arm.
January 1, 2011
Happy New Year to everyone. Also, today I am 72 years old. What did I do today? What else…I worked on my trailer chassis. My work area is my carport with the openings closed off with plywood and tarps to keep the wind out so that the MIG welder will work properly. Now, if I could only learn how to use it properly.
So far, in the past few days, I did some welding to hold the frame together and welded in my cross members. The welds look like crap, but I think they’ll hold. My son-in-law comes over Monday to make sure the welder has the right settings and to try to show me what I’m doing wrong on my welding.
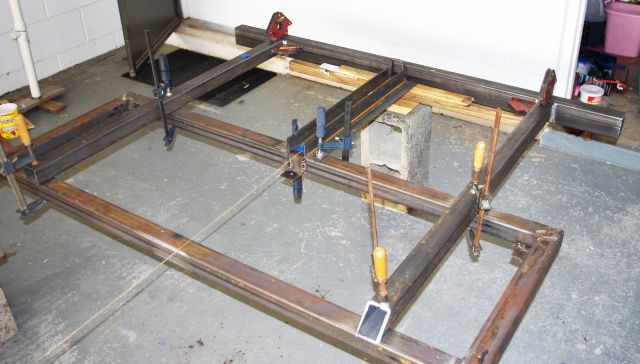
In the two photos below, the chassis is where I’m at right now. I trimmed the front ends of the tongue pieces to fit together, aligned them and clamped them to the frame. The string is my centerline to make sure the tongue is aligned properly. My son-in-law will weld the tongue on for me as that’s a critical welding job and has to be right. I still have to cut two pieces of angle iron for the spare tire support, then the bumper can be welded on. Once the tongue and bumper is on, we’ll turn the frame over and he can finish the top welding of the corners and the tongue.
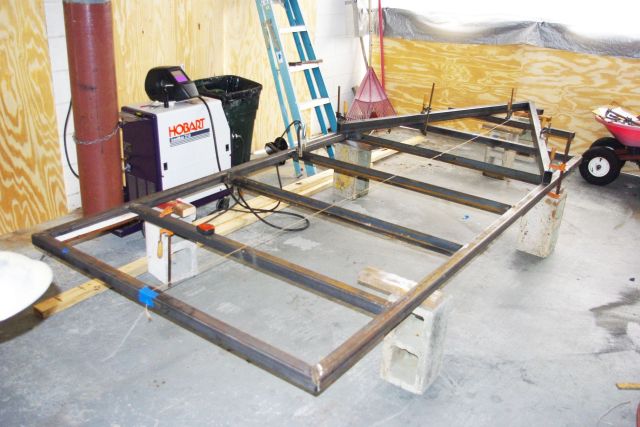
The entire frame without the rear bumper yet to be added.
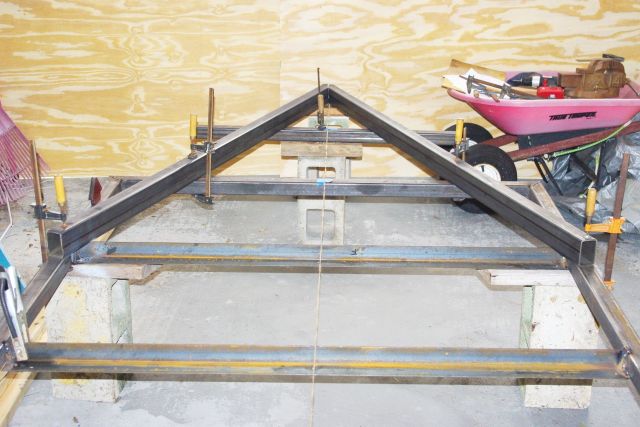
Closer view of the tongue pieces.
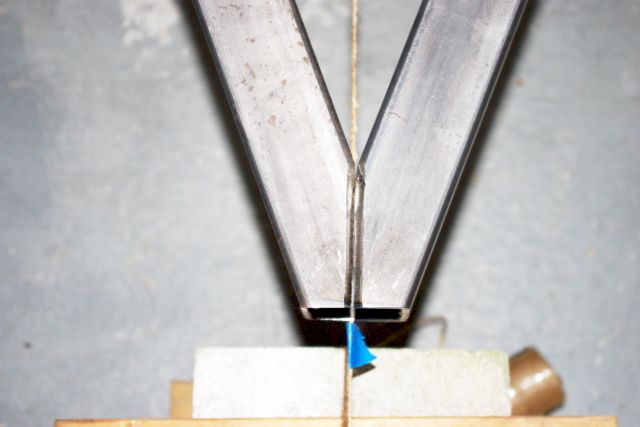
Closeup of the front ends of the tongue ready for welding.
January 5, 2011
I've slowed my chassis work to a crawl, doing bits and pieces. I've fitted the rear bumper and constructed my spare tire carrier, but won't show that until the chassis is finished and the carrier is bolted to the bumper.
This photo shows the bumper bar and two bumper supports clamped to the chassis end rail and the rear cross member for welding. The two pieces of angle between the bumper bar and the end rail are to support my spare tire carrier.
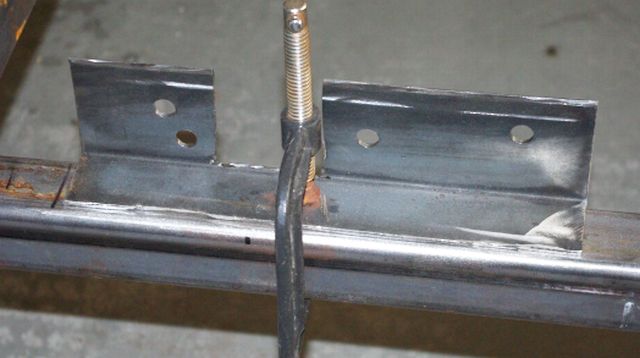
I needed a piece of 2x3 angle to make my axle mounting brackets. I didn't want to drive a 20 mile round trip to my metal supplier, so I used my angle grinder with a cutting disk to split a piece of 3x3 tube into two angle pieces. I then cut out the slot for the axle's shaft to fit through and drilled my mounting bolt holes.
The wood device is a width guage for positioning my axle mounting brackets on the side rails. In the end, I laid the axle upside down on the chassis and brackets to get the brackets exactly aligned, then tack welded the brackets before removing the axle and completing the welding of the brackets to the side rails.
January 9, 2011
I finally decided on using flexible plastic conduit over steel conduit to run the wiring for the tail lights from the coupler to the rear of the cabin. I welded conduit hangers to the tongue and side rail to hold the conduit in place and test fitted the conduit. I won't have photos until the underside of the chassis is painted and the conduit installed prior to starting work on the floor and cabin.
January 13 through January 16, 2011
I spent one day of final welding touch ups, grinding, applying aerosol foam in the tube ends, one day of preparation, and two days of applying two coats of Rust Bullet with my neighbor, Tom, helping me turn the chassis over twice. I used only one and one half quarts of Rust Bullet, so I overestimated how much I’d need. One quart and one pint would have sufficed. When I finished, I seal the can with plastic between the surface of the contents and out over the lip of the can so that it will last a while in case I need to coat more metal.
Before turning the frame right side up, I put my conduit tubing in place with pull strings already through the conduit. It was then that I realized that I put the end hangers on the last cross member, not the rear rail, and I cut my conduit for those hangers. So I’ll span the last two feet with connectors and more tubing. This photo shows how the hangers hold the conduit beneath the frame (chassis frame is still upside down).
We're expecting rain tomorrow, so it may be couple of days yet before I can show the completed chassis.
January 22, 2011
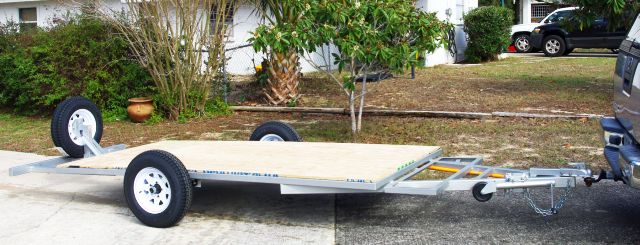
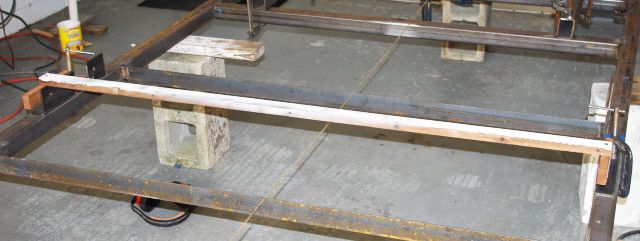
For the past week I’ve been constructing the floor and installing foam insulation beneath the floor. I still have some caulking to do on the insulation to completely shield the plywood floor from water getting to it. Today I rolled out the trailer with the floor on it to make these photos.